On your Hosting, Secure your WP site with minimal plugins
Securing your WP Site is not always a job left to those who are expert system administrators. With some new tools, combined with a friendly hosting, you can do that by yourself and have a secured site without any outside assistance. Today I’m going to show you how to do just that with the least amount of plugins possible. Following my own advice of “the less plugins the better”, in today’s article I’m going to use just one !
On your Hosting
The first step to have a very secured site comes directly from your hosting account. If your site is not secured by a certificate, now it’s the time. Securing your site with a certificate is easy enough and everyone should be able to do it from cPanel & Plesk based services without outside intervention.
![]()
![]()
![]()
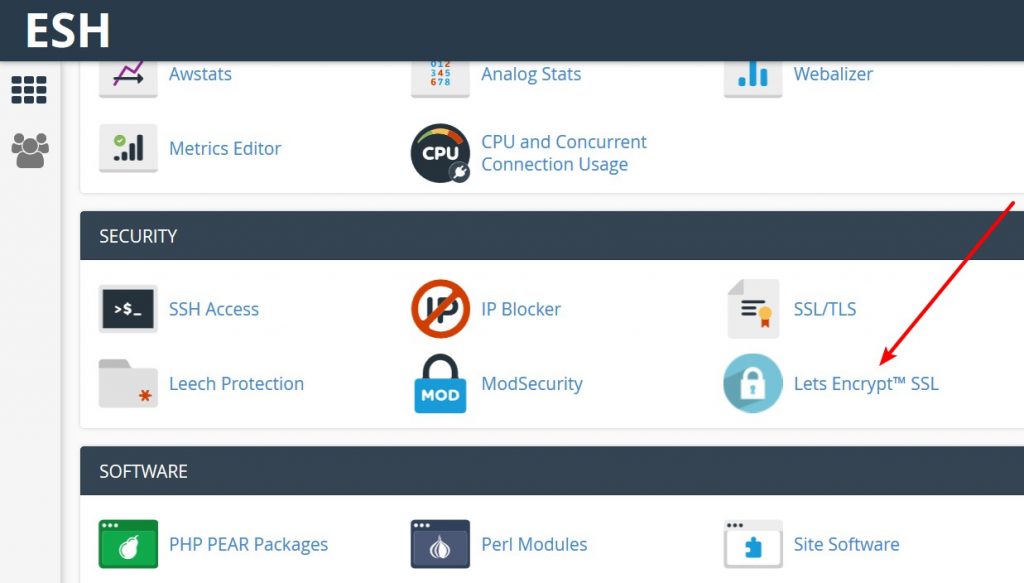
Before proceeding to enable https inside WordPress we need to load the certificate into our domain. This is fully automatic on cPanel through a button and some newer cPanel installations comes with automated Let’s Encrypt certificates so as soon as your account is created you’ll have a certificate loaded into your domain.
![]()
![]()
![]()
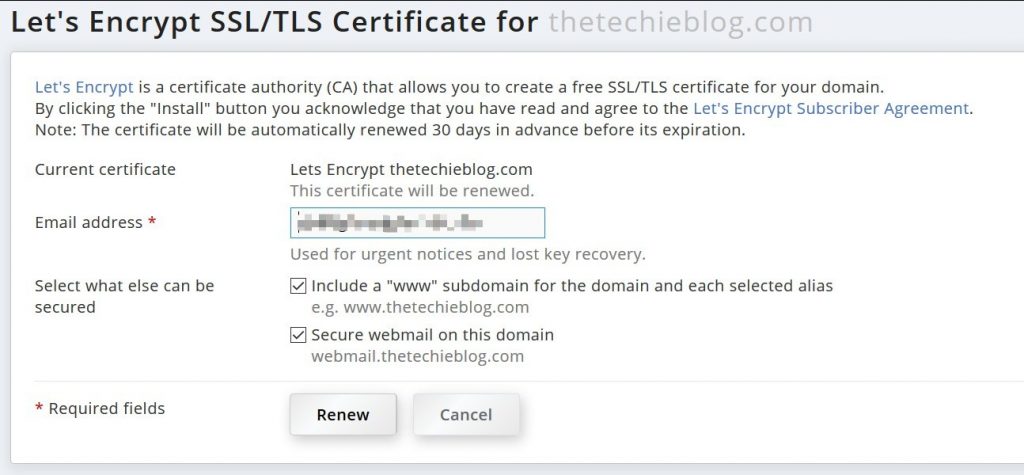
If you’re using Plesk, you can create a Let’s Encrypt certificate from the main menu. You should also include the “www” and mail certificate. This will increase the security of your site by not allowing to load unsecure content and it’s the most recommended first step to secure your site..
Changing Permissions on Important Files
The single second most important security rule is to limit file access to Read Only on the following files: wp-config.php, wp-settings.php and index.php on the WordPress root folder.
This can be easily done on cPanel & Plesk and the vast majority of Control Panels by changing the permissions like this:
![]()
![]()
![]()
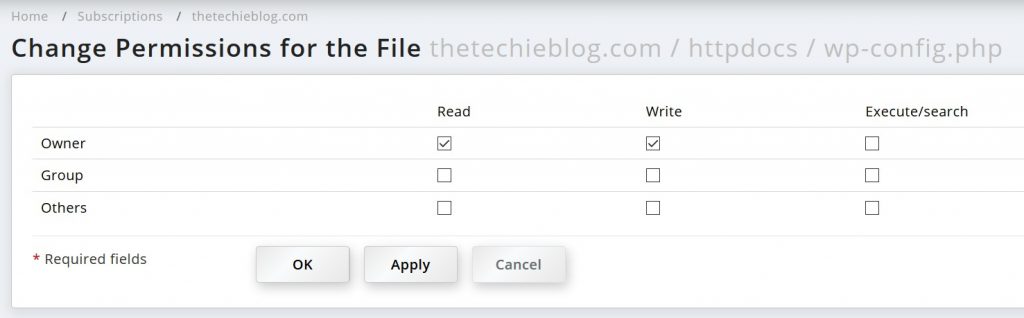
The only one that should have “write access” on those specific files should be the owner. No other group should have any other permissions applied as those files will be read by WordPress alone. This will effectively reduce the security risk of your site by not exposing any kind of access to the outside world.
If by any chance your site gets hacked or has a malicious worm, this is how it’s going to look like.
![]()
![]()
![]()

A bad file permission or outdated theme could inflict serious harm to your WordPress installation by allowing injection of malicious code into your site. This is a classic example. Notice the @include surrounded by /*f2e34*/ ? That code is actually a “worm” that was injected by bad file permissions into a WP site. This kinds of codes could potentially create a backdoor for anyone to access your site and inject advertising, steal information and any kind of bad behavior. This is why manually changing permissions on those important files is so essential.
On your WordPress
Now let’s tweak our WordPress site to improve the security even more.
![]()
![]()
![]()

6.Different Types of SSL Certificates.
The most common way to setup an SSL certificate is on your own primary IP address. This is known as a Dedicated SSL Certificate. It will only apply to your domain and web server. Not everybody has enough money to purchase a dedicated hosting plan, but lucky for all of us, there are other solutions available.
Generally there are three different types of SSL certificates you could use. Some service providers may offer a free certificate as a limited-time trial offer but these certs are by no means any more secure than a standard HTTP connection and they expire quickly.
- Dedicated SSL – This is the most secure and evidently the most expensive solution. An HTTPS connection is only verified for your root domain targeted via a designated IP address.
- Shared SSL – Web hosts which offer shared hosting will sometimes have multiple domain names pointing to the same IP address. In this case it’s much easier for the host to manage one single SSL on each server spanning an array of different websites.
- Wildcard SSL – These can be similar to a dedicated or shared SSL certificate based on server configuration. Wildcard SSL certs will target multiple subdomains for your website. This is a viable solution if you split up different functions of your website e.g. shop.domain.com, checkout.domain.com, etc.
If you are just getting started I highly recommend using a shared SSL setup. It’s unlikely you will be able to afford a dedicated web host/IP address right away. And even if you can, the costs of a dedicated SSL certificate are atrocious. But it’s absolutely something you should look into if possible.
However, since this guide is targeted for beginners I think a shared certificate is more than enough to get started on.