Step 1: On the iPhone, tap Settings.
Step 2: Tap Mail, Contacts, Calendars.
Step 3: Tap Add Account.
Step 4: Tap Other.
Step 5: Tap Add Mail Account.
Step 6: Complete the Name, Address (email address), Password and Description fields.
Step 7: Click Next.
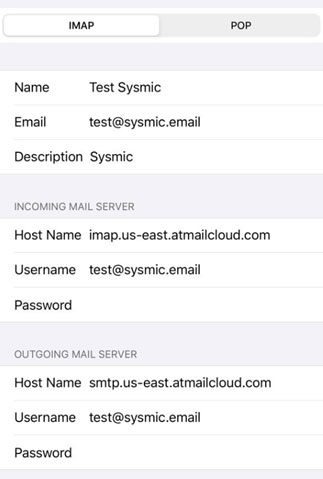
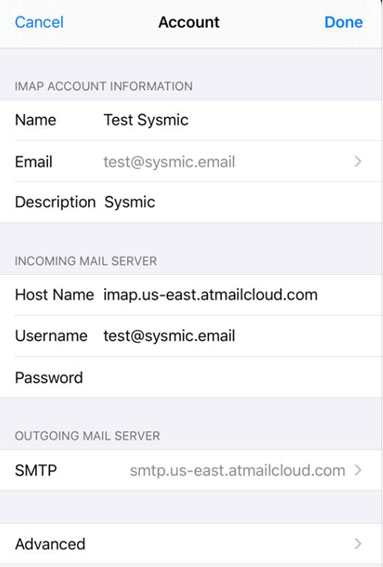
Step 8: Ensure IMAP is selected.
![]()
![]()
![]()

Step 9: Enter your incoming mail server information:
- Hostname is imap.us-east.atmailcloud.com
- Username is your full email address
- Password is the same password used to access webmail
![]()
![]()
![]()

Step 10: Enter your outgoing mail server information:
- Hostname is smtp.us-east.atmailcloud.com
- Username is your full email address
- Password is the same password used to access webmail
![]()
![]()
![]()
Step 11: Tap Next.
Step 12: Go to Advanced >
![]()
![]()
![]()
![]()
![]()
![]()
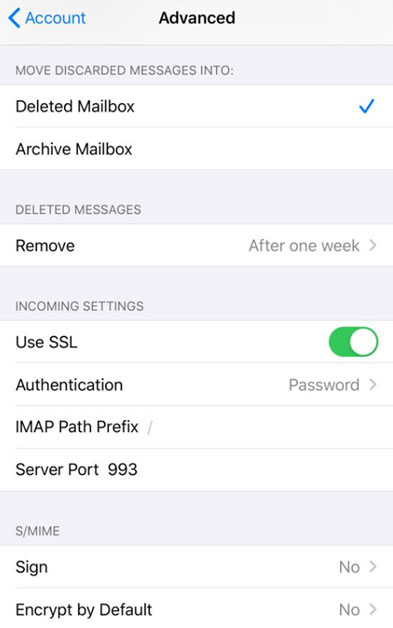
Step 13: Select ON for Use SSL (default option).
Step 14: Select Authentication and change it to Password.
Step 15: Server Port should be set to 993.
Step 16: Select Done at the top (the phone will Verify your settings).
Step 17: Select Account at the top to go back.
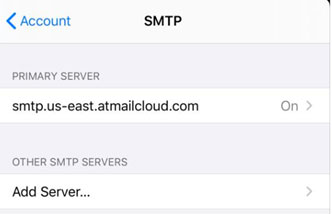
Step 18: Go to SMTP and then On >
![]()
![]()
![]()
![]()
![]()
![]()
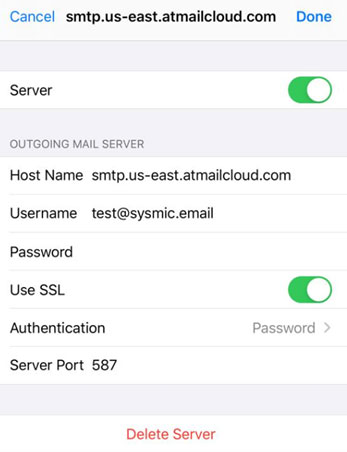
Step 19: Scroll down to Outgoing Settings.
Step 20: Select ON for Use SSL.
Step 21: Select Authentication and change it to Password.
Step 22: Select 587 for Server Port.
Step 23: Tap your Account to go back.
Step 24: Tap Done to go back (the phone will Verify your settings).
Step 25: Tap the Home button.
Step 26: Tap the Mail App to check your configuration.