Before you import email
- Have your Office 365 user id and password handy.
- Install Outlook on your desktop (it comes with most Office 365 plans). If you don’t have Outlook, see how to get Outlook for your desktop.
- Add your Office 365 mailbox to Outlook
TIP: Don’t have Office 365? And you want to keep Gmail as your service? You can still use Outlook to read, write, and manage your email. Just perform Step 1: Prepare Gmail for connecting to Outlook and then Step 2: Add your Gmail account to Outlook.
Step 1: Prepare Gmail for connecting to Outlook
Before you connect your Gmail account and Outlook, you need to prepare your Gmail account. You’ll need to turn on 2-step verification for Gmail and then create a password that Office 365 will use with your Gmail address to make the connection.
Step 2: Add your Gmail account to Outlook
When you’re finished with this step, you’ll see your existing Gmail messages in Outlook. You can use Outlook to receive, read, and send new messages from your Gmail account. You can also continue to use your Gmail account as before through the Gmail web site.
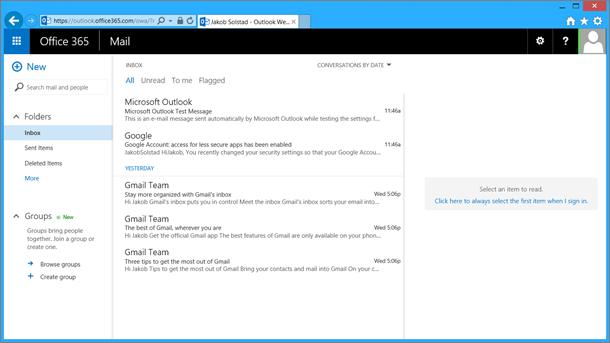
- Open Outlook on your desktop (such as Outlook 2010, 2013, or 2016). The top ribbon looks like this, with File in the left corner:You can only use a version of Outlook that has File in the left corner – it means your version has an Import/Export wizard.If your Outlook ribbon looks something like the one below, then you’re not using a desktop version of Outlook. See How to get a copy of Outlook for my desktop.
- In Outlook on your desktop, choose File > Add Account.
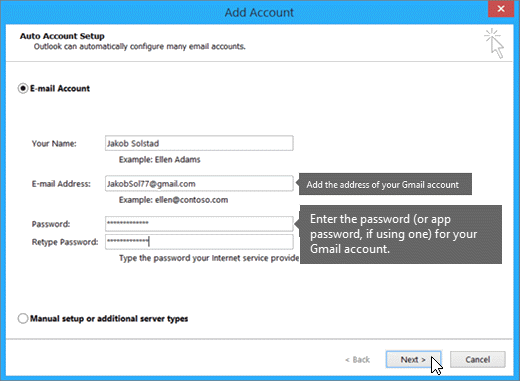
- On the Auto Account Setup page, enter your name, your Gmail address and your Gmail password, and then choose Next.
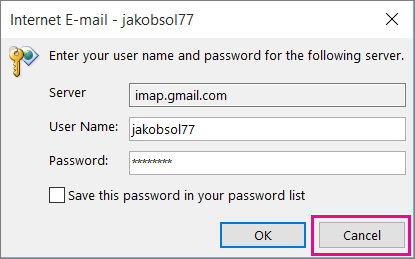
If the configuration process doesn’t finish and you instead get prompts to enter your user name and password for the imap.gmail.com server, choose Cancel and re-enter your password in case the first one had a typo. If you continue having problems, see Fixing problems with adding Gmail to Outlook. - Click Finish. Outlook syncs with your Gmail account. The email in your Gmail account will appear in Outlook, right below your Office 365 mailbox.
Step 3: Copy your Gmail messages to your desktop
Mac users: If you are using Outlook for Mac 2011, there are other export and import instructions.
When you’re finished with this step, a copy of your Gmail messages will be stored in a file that Outlook creates on your desktop. The file is called an Outlook Data File (.pst). If you receive more email to your Gmail account after you take this snapshot, those additional messages won’t be copied to your .pst file, but you can always repeat these steps to copy them.
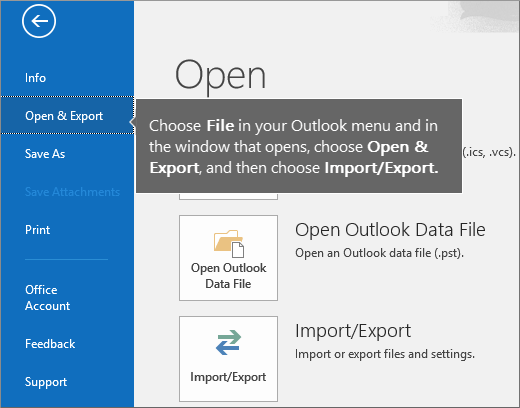
- In Outlook on your desktop (Outlook 2013 or Outlook 2016), choose File > Open & Export > Import/Export.
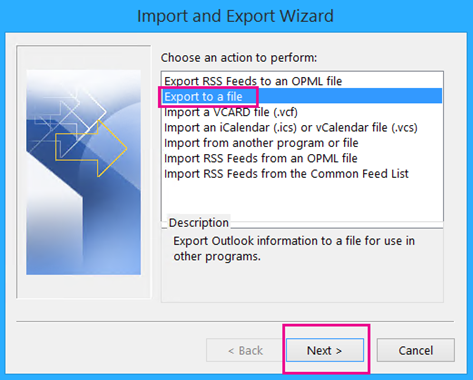
- Choose Export to a file, and then choose Next.
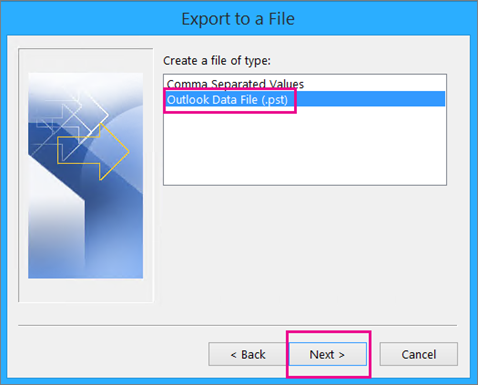
- Choose Outlook Data File (.pst), and then choose Next.
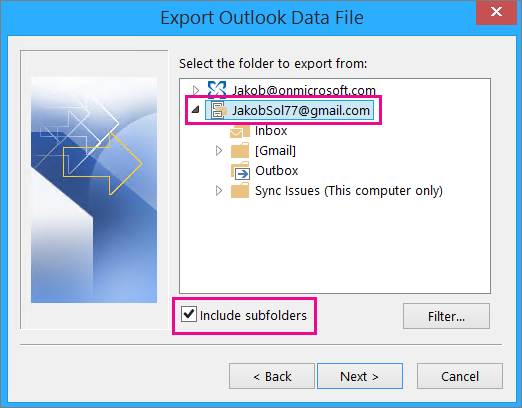
- Select the account you want to export by choosing the name or email address of your Gmail account, and verify theInclude subfolders box is checked (this ensures all your email is copied), and then choose Next.
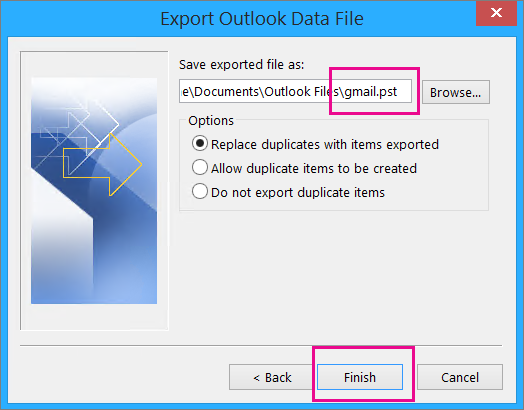
- Choose Browse to select where to save the Outlook Data File (.pst) and to enter a file name. By default, the name is “backup,” so choose another name that’s easy to remember, such as gmail. If you are exporting to an existing Outlook Data File (.pst), under Options, specify what to do when exporting items that already exist in the file. Choose Finish to continue.
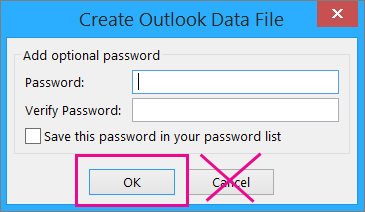
- In the Add an optional password dialog box, add a password if you want. Choose OK to save the data file even if you leave the password boxes empty. Without further notice, Outlook begins exporting the data immediately. It doesn’t give you a message when it’s done, either.
- Go to the location where you saved the .pst file to confirm it’s there.
Step 4: Copy your Gmail to your Office 365 mailbox
When you’re finished with this step, the email in the .pst file will be available in your Office 365 mailbox.
- In Outlook on your desktop (Outlook 2013 or Outlook 2016), choose File > Open & Export > Import/Export to start the Import and Export Wizard.
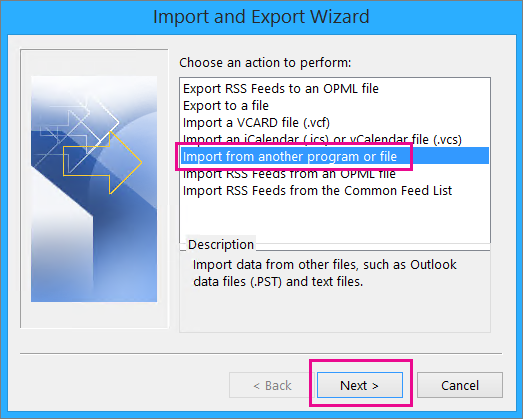
- Choose Import from another program or file > Next.
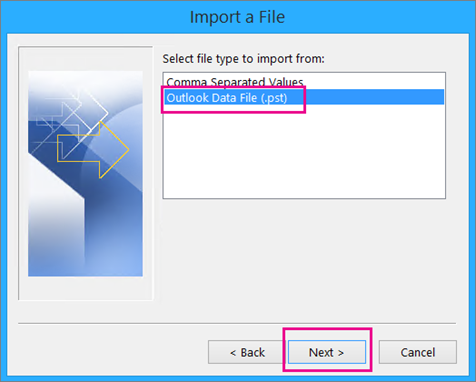
- Choose Outlook Data File (.pst) > Next.
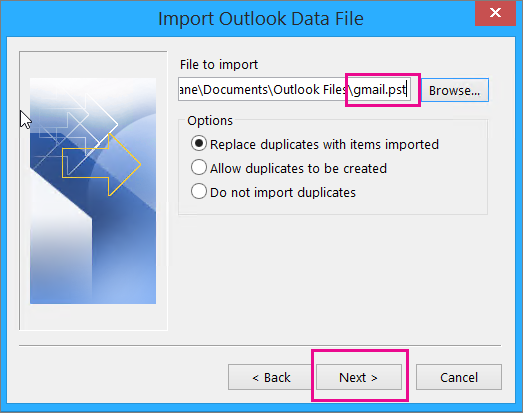
- Browse to the .pst file you created in Step 3 (in our example the file is named gmail.pst). Under Options, choose how you want to deal with duplicates. Choose Next.
- If you assigned a password to the Outlook Data File (.pst), enter the password > OK.
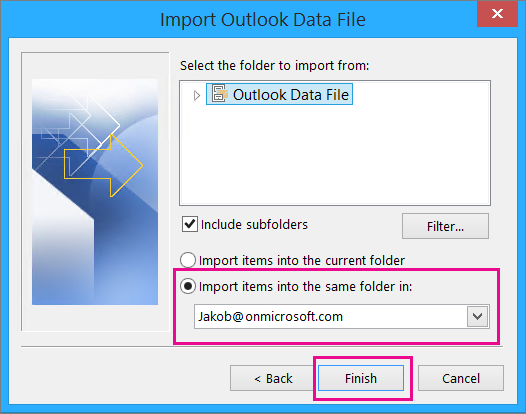
- Choose to import the email into your Office 365 mailbox (in the example, the Office 365 mailbox is named [email protected]). Choose Finish.
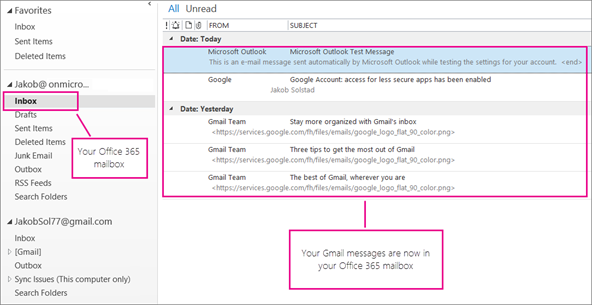
- Outlook starts copying the information from the .pst file to your Office 365 mailbox. If you have lots of data, this may take hours. If you shut down Outlook or disconnect from the Internet before the import completes, it will continue the next time it’s reconnected.When Outlook is finished, you’ll see the snapshot of your Gmail, now stored in your Office 365 mailbox. Congratulations! Your old Gmail messages are now in your Office 365 mailbox!Because your old Gmail is stored in your Office 365 mailbox, you can use Outlook on the web to access those email messages from any device.
(Optional) Step 5: Remove your Gmail account from Outlook
When you’re finished with this step, your Gmail account will still exist, but you won’t see it in Outlook. If you receive any more emails at that Gmail account, you’ll need to repeat the steps in this article if you want them in your Office 365 mailbox.
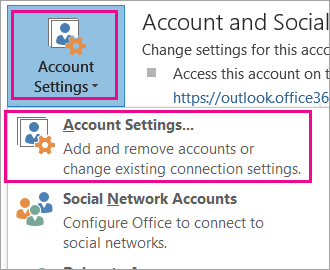
- In Outlook, choose File > Account Settings > Account Settings.
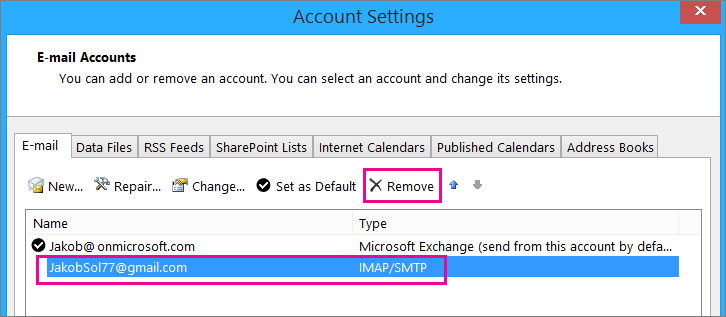
- In the Account Settings box, select your Gmail account, and then choose Remove.
- In the dialog box about the offline cache being deleted, choose Yes.The Gmail messages that you imported to your Office 365 mailbox are still there, but your Gmail account no longer appears in Outlook.
Fixing problems with adding a Gmail account to Outlook
Here are 3 common problems customers experience when importing Gmail to Outlook.
- Problem 1: If you get the following prompt, choose Cancel (it will take a couple of times), and then choose Cancel again at the Auto Account Setup page so the prompt stops appearing.
This prompt occurs because Google thinks someone besides you has your password. It will display this prompt repeatedly, each time Outlook pings Google. This happens if:
- You typed the wrong password. To fix, doublecheck your password.
- Or, you’re using a computer that you haven’t used before to sign into your Gmail account.
- Or, you haven’t signed in to your Gmail account for a while.
To fix, try this:
- Sign in to your Gmail account using the same computer you’re going to use for the Add account process.
- Make sure you’ve done the steps to prepare your Gmail account.
- Start Step 2: Add your Gmail account to Outlook again, starting at step 3, File > Add account.
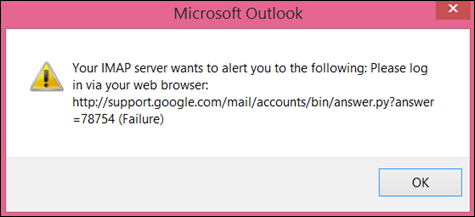
- Problem 2: If, instead of seeing your Gmail messages in Outlook, you get an error message along the lines of “Your IMAP server wants to alert you to the following……” go to your Gmail account and check that Allow less secure settings has been set to ON, and then do the steps again to add your Gmail account to Outlook.
- Problem 3: You get the error message “Could not complete the operation because the service provider does not support it.” Are you trying to import your Gmail messages into an Outlook.com or Hotmail.com account? This error is the result of trying to import into an Exchange ActiveSync (EAS) account. The EAS service provider (Outlook.com / Hotmail) does not support importing (or moving), only copying into the folder. For instructions, see Add all your email accounts to Outlook.com.
Next steps
Here are some other things you can do to set up Outlook:
- Import Google Calendar to Outlook
- See your Google Calendar in Outlook: do this if you want to sync your Google Calendar in Outlook.
- Import contacts to Outlook for Windows: instructions for importing Gmail contacts are here.
- Office 365 mobile setup: set up your phones and tables to use email, and if you want, Outlook.


